
The next important step is to complete your site setup so your website looks professional and starts serving listings immediately. Follow this step-by-step guide to finalize your setup quickly and easily.
1. Log in to Your Dashboard
After your site is generated, the first step is to log in to your dashboard. Once logged in, you’ll see a Guideline indicator that displays the progress of your site setup. This visual guide helps you track what’s completed and what’s left.
2. Navigate to the Site Setup
There is only one remaining step to complete your site setup:
- Option A: Click on the last (incomplete) step shown in the Guideline.
- Option B: Use the left-hand menu and select Site Setup directly.
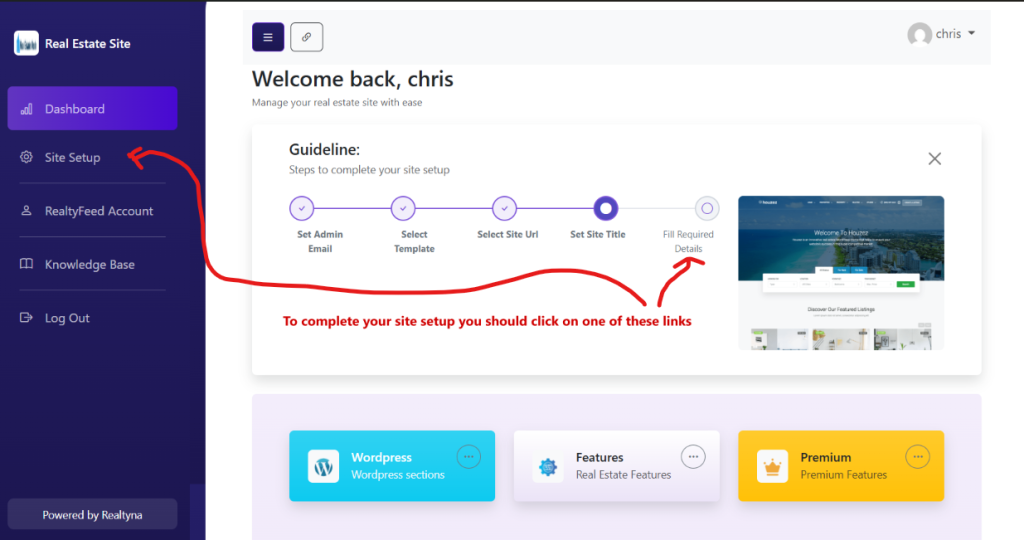
Both options will take you to the Site Setup page where you can configure your site settings.
3. Configure Your Site Settings
On the Site Setup page, you will find several settings that help personalize your website. Some settings are mandatory, so be sure to complete these:
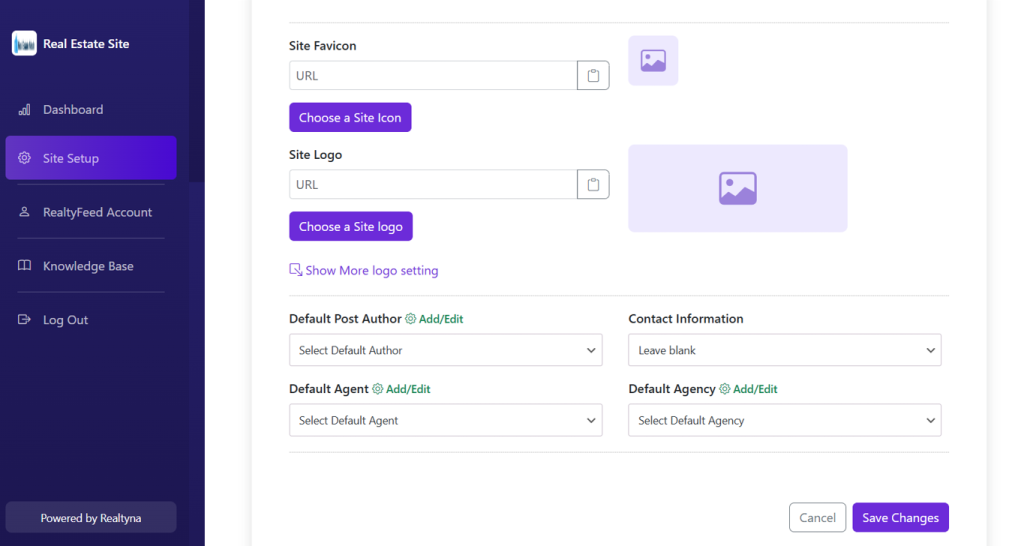
a. Set Your Site Favicon and Logo
- Site Favicon: Upload your custom favicon. This small icon is essential as it appears in the browser tab.
- Site Logo: Set your official site logo to establish your brand identity.
b. Update Default Values for Listings
These default settings ensure that your MLS-integrated listings display accurate information:
- Default Post Author: This is used as the publisher for listings. Update it to reflect your preferred publisher name.
- Contact Information: Choose which contact information to display on your listings. You have three options:
- Leave Blank
- Show Agent Information
- Show Agency Information
- Default Agent: Set the default agent for your listings. By default, demo data is pre-filled.
- Default Agency: Set the default agency for your listings. Again, you can update the demo information by clicking the Add/Edit link next to this option.
Tip: Make sure the Default Post Author, Default Agent, and Default Agency accurately represent your business information. This helps potential clients know who to contact for more details.
4. Save Your Changes and Return to the Dashboard
Once you’ve configured the mandatory settings and updated the default values, click Save Changes. After saving, return to your dashboard. If everything is configured correctly, your site will immediately begin serving demo listings.
You’ll notice a notification at the top of your dashboard that reads: “You Are Using Demo API Key, Use Your Own to Get Live Listings Immediately.”
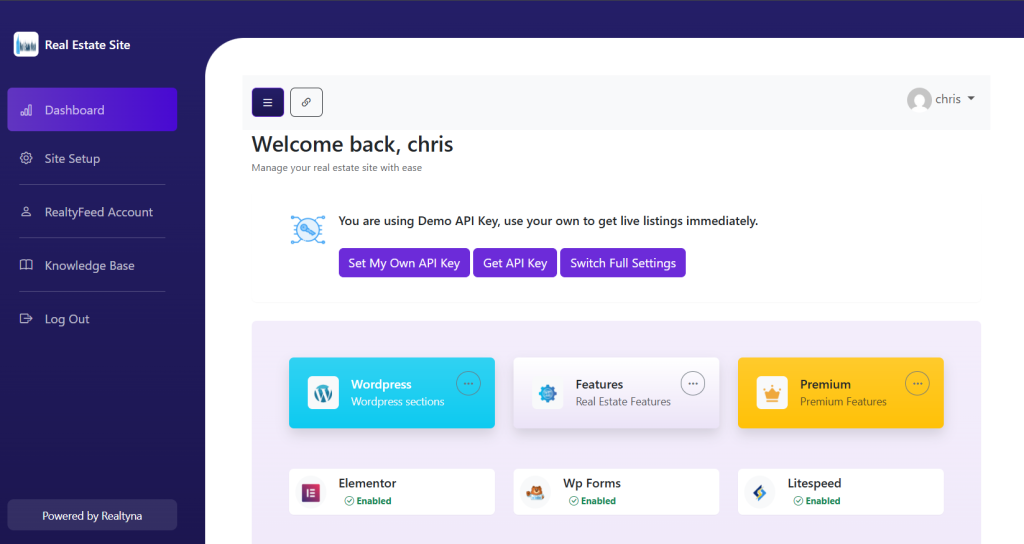
This is your cue that all setup features are unlocked and your demo configuration is in place.
5. Get Your API Key and Go Live
To start serving real listings, update your API settings:
- Set Your API Key: If you already have your API key from RealtyFeed.com, replace the demo key with your own.
- Don’t Have an API Key Yet? Click on Get API Key and follow the provided link to secure your API key. Once updated, your website will display live MLS listings, making your real estate site fully operational.
Final Thoughts
Completing your site setup is a breeze with our intuitive dashboard and guided instructions. By following these steps, you ensure that your website reflects your brand identity, displays accurate listing information, and is ready to attract real estate clients.
Start exploring your site now, update your API key, and unlock the full potential of your real estate business. Enjoy the seamless experience and watch your site transform into a dynamic marketplace for properties!